User Guide
BookFace is a desktop GUI application for the students in the National University of Singapore (NUS) to manage the contact information of the people they meet in the various lessons or clubs that they participate in. Since NUS Students often take many classes and meet different people. This application helps them to organise their contacts list for an easier way to set up proper communication channels.
Quick start
- Ensure you have Java
11or above installed in your computer. - Download the latest
bookface.jarfrom here. - Place
bookface.jarfile in the folder you would like to use as the home directory. - Ensure that the home directory is empty and does not contain folder such as ‘data’.
- Run the application. This can be done by either executing the
jarfile, or opening a command terminal,cdinto the home directory, and running thejava -jar bookface.jarcommand. The following GUI will appear upon first use of the application.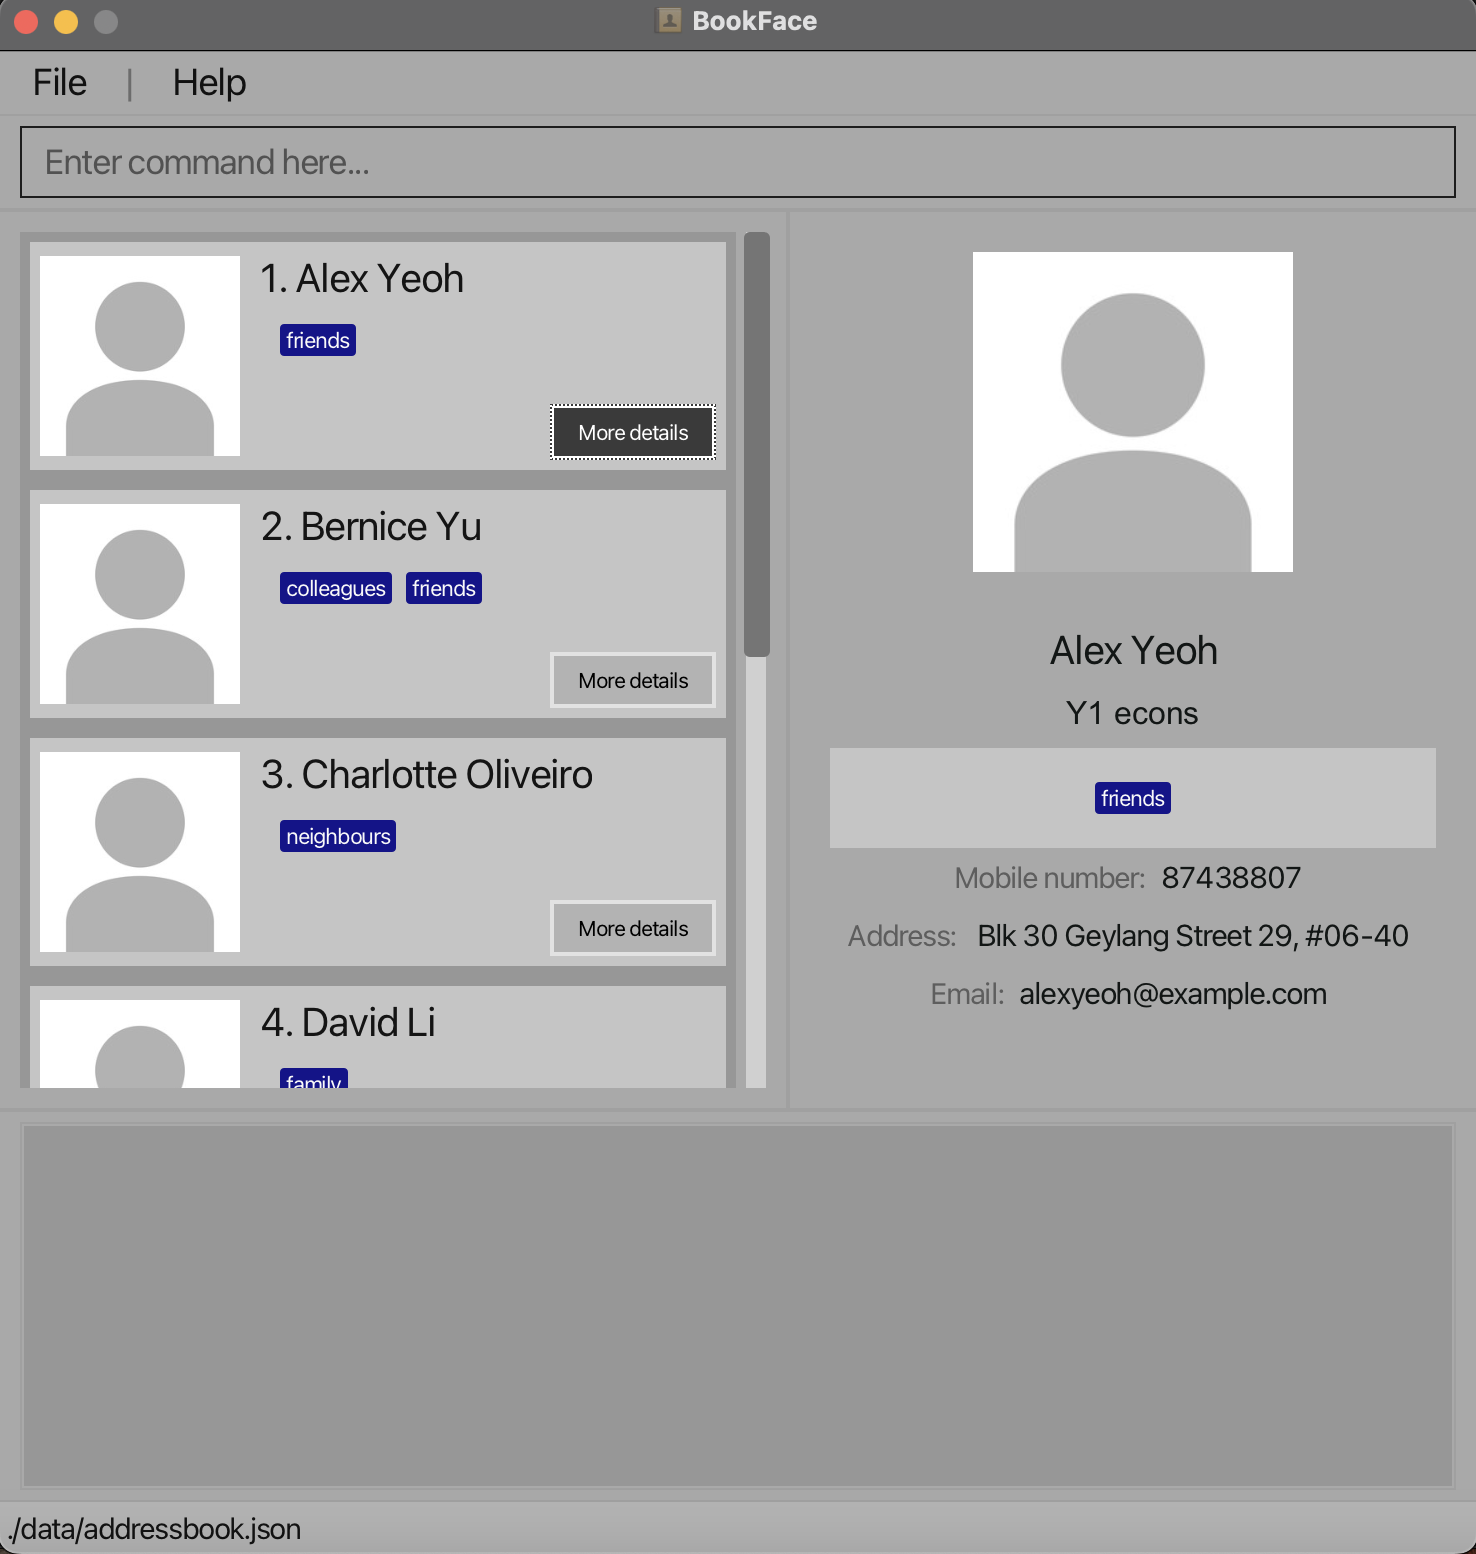
- The application is initially loaded with sample data for new users to try out the features listed below. Experienced users can delete the sample data and proceed with regular usage.
Features
This section highlights the core features that this application provides, as
well as the necessary guidelines to follow when using the features. The features
generally follow commands of the form COMMAND_WORD ARGUMENTs, with each
feature having its own specific COMMAND_WORD and set of ARGUMENTS.
Note: Unless otherwise stated in the guidelines for the specific feature, arguments placed within brackets (“[” and “]”) denotes that the argument is optional, and not required for the command to run properly.
Add user contacts: add
Format: add n/NAME s/STATUS p/PHONE_NUMBER e/EMAIL a/ADDRESS [t/TAG, ct/COMMITMENT_TAG, mt/MODULE_TAG] Optional to
add: t/TAG, ct/COMMITMENT_TAG, mt/MODULE_TAG
- User is required to enter name, status, phone number, email, address
- The status field can be alphanumeric and can be used to display a contact’s year and course of study
- Note that when entering course under “status”, course can be more than one word
- Tags can be optional
- If the account exists, user can add in related field of interests to share with others
Example:
add n/Shenghan s/Year2 Computer Science p/99999999 e/david@gmail.com a/punngol place 696a #12-348will displays the necessary basic information that are the user’s name, year/course, phone number, email, address. Optional fields are tags, for which there are commitment/cca tags, module tags and lastly the general tags for users to enter non-specific typed tags.
Function for each tag:
Tag: This tag can be anything in general, such as relationship or staying on campus.
Commitment tag: This tag contains all the NUS CCAs that a person has joined.
Module tag: This tag contains all modules that a person is taking in this semester.
Example (with the addition of tags):
add n/Shenghan s/Year2 Computer Science p/99999999 e/david@gmail.com a/punngol place 696a #12-348 t/developer ct/soccer mt/cs2103- Note that the tags can be placed in any part of the command, and it will not break!
Tags are categorised according to tag colors:
- Commitment tags:
coral pink - Module tags:
dark green - General tags:
default blue
Delete user contacts: delete
Delete a contact.
Format: delete INDEX
- Show contact details specified by
INDEX - The index refers to the index number shown in the displayed person list.
- The index must be a positive integer 1, 2, 3, …
Example:
delete 2deletes the second person in the list of contacts.
Edit user contacts: edit
Edit a contact.
Format: edit INDEX [n/NAME] [s/STATUS] [p/PHONE_NUMBER] [e/EMAIL] [a/ADDRESS] [t/TAG, ct/COMMITMENT_TAG, mt/MODULE_TAG]
- At least one of the optional arguments must be specified.
- Show contact details specified by
INDEX - The index refers to the index number shown in the displayed person list.
- The index must be a positive integer 1, 2, 3, …
Example:
edit 2 n/James Lee e/jameslee@example.com s/Year2 Computer Science p/99999999 e/david@gmail.com a/punngol place 696a #12-348 t/developer ct/soccer
mt/cs2103
Edits the specified information for the second person in the contact list.
Locating persons by keywords: find
Finds persons whose contact details contain any of the given keywords based on the prefix specified.
Format: find PREFIX/KEYWORD [MORE PREFIX/KEYWORD]
- The search is case-insensitive e.g.
hanswill matchHans - The search will filter by the
PREFIXprovided, e.g.n/searches through the names of the contacts,p/searches through the phone number of the contacts,t/searches through the tags of the contact, etc… - Each prefix must be followed by one and only one keyword. See below for example usage.
- Only the contacts that fulfill all the requirements in the given
arguments will be displayed, i.e.,
find n/john t/cswill return the list of contacts where his name isjohnand has a tag that containscs. - The following shows a list of allowed prefixes:
n/which represents the names/which represents the statusp/which represents the phone numbere/which represents the emaila/which represents the addresst/which represents the tags
Example:
find n/amy t/cs2103 e/gmailwill return the list of contacts whose names areamy, has a tag labeledcs2103, and whose emails containgmail.
Listing all contacts: list
List all contacts in the address book.
Format: list
Help command: help
Shows a link to the user guide to help new users get familiar with the commands for the application.
Format: help
Add an image for contacts: add-image
Add a contact image for each contact.
Format: add-image INDEX ai/PATH-TO-IMAGE
- Adds an image to the contact at the specified
INDEX - The index refers to the index number shown in the displayed person list.
- The index must be a positive integer 1, 2, 3,…
- Ensure that
ai/prefix is used before the image path (note thatai/is not part of your path) - Initially, a default image is used for a contact
- After an image is added, if the application is unable to retrieve the image (e.g. erroneous manual edit of addressbook.json or the saved images) then it will revert to the default image
Examples:
- Windows:
listfollowed byadd-image 2 ai/C:/Users/user/Downloads/weekiat.pngadds the imageweekiat.pngto the 2nd person in the address book - MacOS:
listfollowed byadd-image 2 ai//Users/user/Downloads/weekiat.pngadds the imageweekiat.pngto the 2nd person in the address book
Some FAQ Regarding Add Image
How to get Image Path?
Note: Steps to get path may differ depending on your operating system and its version
- MacOS:
- Right-click on the image file
- Once the menu appear, hold the OPTION key (⌥)
The “copy” option should become “copy [file_name] as Pathname” - The path should be copied once you select the option
- Windows:
- Right-click on the image file
- Select “copy as path” option
- The path should be copied once you select the option
Note: That for Windows copied path may have quotation marks, please remove them before using in BookFace.
For instance:add-image 2 ai/"C:/Users/user/Downloads/weekiat.png"will be invalid, whereasadd-image 2 ai/C:/Users/user/Downloads/weekiat.pngwill be valid.
Common User Errors
Referenced file does not existeven though the image is there- The path used may be incorrect due to differences in Absolute and Relative path
- The 2 types of file paths are different in that:
- Absolute path is a complete path from root to the file itself (Windows usually starts with
C:and Linux/Mac with/) - Relative path starts from the home directory
- Here is an external link to learn more
- Absolute path is a complete path from root to the file itself (Windows usually starts with
- The path used may be incorrect due to differences in Absolute and Relative path
Delete an Image for contacts: delete-image
Delete the image of a contact.
Format: delete-image INDEX
- Deletes the image of contact specified by
INDEX - The index refers to the index number shown in the displayed person list.
- The index must be a positive integer 1, 2, 3, …
- A default image will be used after it is deleted
Example:
delete-image 2deletes the image of the 2nd person in the address book.
Quick Import for faculty contacts: import
Import staff contacts for relevant faculties.
Note: ‘staff’ can refer to any person in the teaching, administrative or management teams in the faculty
Format: import FACULTY
- Faculty acronyms (e.g. soc)
- Only selected faculties (soc and chs) are available
Example:
import socadds all important contacts of staff for School of Computingimport chsadds all important contacts of staff for College of Humanities and Sciences
Exit the program: exit
Closes the window and exits the program.
Format: exit
Editing the data file
It is possible but not recommended for users to manually edit any of the JSON files created by BookFace, as there is a large chance that the changes render the format of the JSON files invalid, and the application to stop working as intended. In situations where an edit to the JSON file causes the application to stop working, the user should either undo any of the changes made, or delete the JSON file entirely which will prompt BookFace to create a fresh copy. Note that the latter will erase any data that the user previously had. The developers of BookFace will not be liable for any significant loss of data as a result of tampering with the JSON files.
Command summary
| Action | Format, Examples |
|---|---|
| Add | add n/NAME s/STATUS p/PHONE_NUMBER e/EMAIL a/ADDRESS [t/TAG, ct/COMMITMENT_TAG, mt/MODULE_TAG]… e.g., add n/James Ho s/Y2 Science p/22224444 e/jamesho@example.com a/123, Clementi Rd, 1234665 ct/soccer mt/cs1010s |
| Delete | delete INDEXe.g., delete 3 |
| Edit | edit INDEX [n/NAME] [p/PHONE_NUMBER] [e/EMAIL] [a/ADDRESS] [t/TAG]…e.g., edit 2 n/James Lee e/jameslee@example.com |
| Find | find PREFIX/Keyword [MORE PREFIX/KEYWORD]...e.g., find n/amy t/cs2103 e/gmail |
| List | list |
| Help | help |
| Add-Image | add-image INDEX ai/PATH-TO-IMAGE e.g., add-image 2 ai/C:/Users/user/Downloads/weekiat.png |
| Delete-Image | delete-image INDEX e.g., delete-image 2 |
| Import | import FACULTY e.g., import soc, import chs |
| Exit | exit |